Back in January, the second Donor’s Choose project was funded. This project included a 3D printer, filament, and other art materials. The kids were sooo excited when the 3D printer arrived. We even had an “unboxing” party on the spot. I wish I had recorded it, but I was working on the unboxing. It was fun to do this with the kids because they had a hard time containing their excitement and were buzzing with project ideas.
Now that students had a 3D printer, it was time to learn how to use it. This was new territory for me, too. I did some design platform exploring and practiced designing projects. I wanted to make certain the design platform would work on my students’ chromebooks, easy program to use, and a way for students to send me their work for printing. I found several programs, but Tinkercad was the one that seemed most user friendly for my 4th and 5th graders.
I would like to share some tips, so you can get 3D printing up and going in your classroom or home. Within these tips, I also share any challenges that I had and what I did to solve that problem.
This post may contain affiliate links, and I may earn compensation when you click on the links at no additional cost to you.
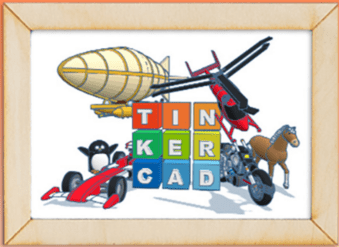
TIP 1: Set up a Tinkercad account. I found Tinkercad is an easy platform for my 4th and 5th graders to get started with designing online. Since they are under age 13, their parent had to verify and approve their account. I don’t have teacher access to any accounts, but parents have access to their kiddo’s account.
Two Tinkercad options:
-
Parents can verify their student account by paying $0.50 to demonstrate they are a parent.
-
Print off, complete, upload, and email the document back to Tinkercad. This option does take a little longer (3-5 days) for students to get access, but it is free.
All my students were able to activate an account with either option. So far, Tinkercad has been a fabulous resource for my students.
TIP 2: To help the kids become acquainted with Tinkercad, I shared a couple “getting started” videos from Tinkercad.com. These quick videos and the project gallery were opportunities to see exactly what can be done with 3D printing.
TIP 3: Now it was time for the kids to login and have time “to play”. The videos provided the perfect framework for the students to get their feet wet. Once logged in, the kids really taught themselves how to use the Tinkercad program. The kids were quite excited about designing. If a student didn’t know how to do something, there was a friend right there to help out. Together students would problem solve until they found a solution. Isn’t this how real life works? THIS was exciting to observe.
TIP 4: Since Tinkercad was a new learning platform, I simply let the kids explore the program. I let the kids design any item they wanted to create. It was quite fun to watch the creativity take off. Several students made gifts for siblings, parents, cousins, and friends. As they continued working, their projects became more intricate.
TIP 5: Once students completed their projects, it was easy for them to use their gmail account and send their project in STL format. When receiving all these emails, I found I didn’t know what color the projects should be printed in. So, I solved this problem by having students “name” their project with their name and color choice. This was a life saver!
Below are the materials that my students use in our classroom. I have found the FlashForge 3D printer to be a perfect entry level printer for beginners. The AIO Robotics PLA filament variety package offers students several color options to print their items. Each roll of filament comes in a ziplock bag; however, I did purchase the rubber maid containers because I could easily stack the containers on my shelf instead of keeping the large box on the counter.


TIP 6: When the first few projects were printed, it was quite interesting. Because the students design using the metric system, students were not thinking about the unit of measurement in this process. When the beginning projects were printed, students soon discovered that 4mm was not the same as 4 inches. This brought lots of learning opportunities and comparisons using the metric system.
TIP 7: I didn’t have enough time to print the projects off during the school day and needed an assistant to keep projects printing. So, I decided to teach a few of my students how to load/unload and transfer the project from email to the printer. This worked like a champ! I didn’t have to be the person changing colors all the time or getting projects started. Although I still had a backlog of projects to print by the end of the week, this one “delegated task” was a time saver for me in the classroom. The kids were also eager to learn how to take on this part of the project printing. However, another way to solve the printing backlog is to get another 3D printer. Yes, I think this will be a future project.
TIP 8: Storing the filament in airtight containers that were accessible to the students became very important. I wanted to neatly store the filament in containers that were airtight and did not take up a lot of space. I went to Walmart and purchased some of the Rubber Maid containers. These worked out perfectly because one container holds one spool of filament. It is important to keep the filament dry, so it will remain in a usable state. If the filament is exposed to air and moisture, it could damage the filament needed for printing.
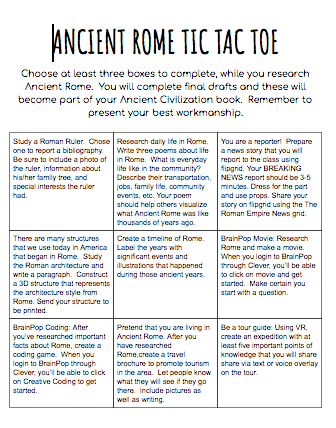
Tip 9: Once the kids had time to play with the design program and create projects of their choosing, it was now time for me to provide opportunities to assign and print “assignment projects”. Since we were studying Ancient Civilizations, this was the perfect time to embed this student choice option as a project to complete. Students could choose 3 of the 9 multiple intelligence project options for each civilization to complete. When the students saw 3D printing . . . they were on it. If you plan to do this, make sure the students research the topic they want to design PRIOR to drafting in Tinkercad.

This text is one that I frequently use for instructional ideas. Although my class is not focusing on “the gifted and talented student”; all students strive to learn when presented with self choice projects and options that relate to their learning intelligence. Throughout the year, I discuss differences in learning and the importance of helping each other because we all have different strengths and weaknesses. This text is a GREAT resource!!
TIP 10: Now that students have had plenty of time to design projects of their choosing AND for assignments, students are excited to continue designing projects. I knew that I needed to ensure the students are making purposeful projects, so I decided to embed a writing assignment for self choice projects. If projects are designed for a topic – not assignment related – students must write me a short 3-5 paragraph essay detailing the project purpose: what is the project, who is it for, why did the student make this project, what were some challenges in design, and how were those challenges overcome. Also, as noted in the Ancient Civilization tic tac toe project board, when 3D projects are used for an assignment, a writing activity always accompanies the task.
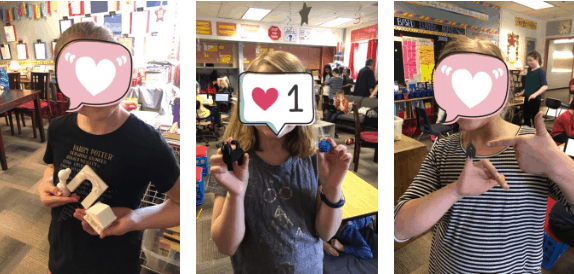
Check out some of the projects students have been working on over the past few months. Some of the projects are self choice and others are ancient civilization assignments.
 Check out these awesome projects students designed and printed!
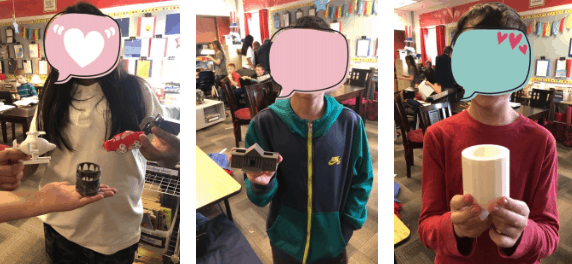
 Check out these awesome projects students designed and printed!
More amazing online designers!
 More amazing online designers!
21st century careers awaiting for these 3D designers!!
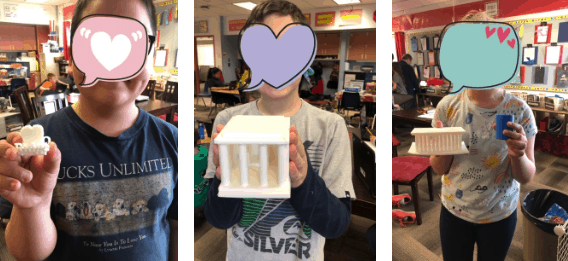 21st century careers awaiting for these 3D designers!!
Using a 3D printer as part of the blended technology program in my classroom has been a rewarding opportunity for the students and myself. Besides the creative minds working, communication, collaborative problem solving, and critical thinking in design, students are learning 21st century skills, math, science, art, social studies, and language to top off the learning experiences. The 3D printer and Tinkercad have been embedded throughout the entire learning process and across the curriculum.


This is something my 13 year old would be fascinated to use!!! Love this!
Hello!!! Yes, this tool is fabulous for letting kiddos engage critical thinking, problem solving, designing, constructing, and integrating with learning. Such a great tool!!!
Take care,
~Annette